How to clean a self-cleaning oven

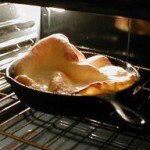
Manufacturers have made us believe that ovens can clean themselves. Although this is in part true, thanks to the self-cleaning ovens, we will still need to apply a little bit of elbow grease to keep our oven looking like new.

Self-cleaning ovens have a special interior pyrolytic coating that, heated at high temperature, burns off all the food and debris without using any chemicals. It’s like magic, isn’t it? But, what happens with the trays, racks, rack supports and glass door? As they have no special coating, they will continue dirty after the self-cleaning process.

So your oven may be clever enough to do some cleaning, but it still needs a helping hand!

Here are some basic steps on how to clean your self-cleaning oven:

1- Remove all trays and racks and soak them in hot soapy water.

2- Wipe any excess debris from the oven with a damp e-cloth and some washing up liquid (do not ever use a green scourer inside the oven as this can damage the special coating).

3- Open the window and turn on the kitchen hood and start the self-cleaning process (there may be some fumes and smoke, so it is better to have the area ventilated). This process can take up to 5 hours.

4- While you wait for the oven to get clean, finish with the trays and racks. Use soapy water if they are not very dirty or a degreaser if they need a strong clean up. Rinse well.

5- As soon as the oven has finished with the self-cleaning process and cooled down, you can wipe the ash from the oven with a damp soapy e-cloth. Use a degreaser to clean the glass door and finish with a glass cleaner for the outside to leave the door shiny and looking good.

So… tell us, what are your tricks for cleaning your oven?

How to clean Plasma TV screens

Gone are the old glass-surfaced TV screens that you could clean with a glass cleaner and cloth. Nowadays a lot of television sets have plasma TV screens and this means that, inevitably, the care and cleaning methods have to be different.

Here are some ideas on how to take care of your Plasma TV.


Don’ts:

1- Use window cleaner. Plasma TVs have an anti-glare coating that may be damaged by the alcohol in the window cleaner.

2- Use paper towels to dust the TV. As soft as they look, paper towels are abrasive and can leave scratches on the surface.

3- Touch the plasma screen with your fingers or any hard object, as this can damage the surface.

4- Use any cleaning spray around the TV. When dusting furniture around your plasma TV, remember to spray the cleaning product into the cloth to avoid any chemical being in contact with the TV.

Do’s:

1- Use a microfibre cloth to dust your plasma TV. It always has to be clean and dry.

2- Use a little bit of washing up liquid if the screen is very dirty. Put warm water in a bawl with a drop of washing up liquid; soak a micro-fibre cloth and rinse it well to leave it almost dry; then use it to clean the plasma screen and immediately after, wipe with a clean and dry micro-fibre cloth.

What other tips do you have to clean your plasma TV screen? Share with us!

4 cleaning products to avoid during pregnancy and their substitutes

Pregnancy always make us aware of our surroundings while we try to create a calm and safe environment for the new baby. At the same time as we think about the nursery and the baby safety around the house, we can’t forget about the cleaning. Most of the cleaning products we buy on supermarkets are made of harmfull ingredients that can cause anything from a mild reaction to more severe health problems.

Here are 4 cleaning products that you should avoid if pregnant and what you could use instead:

1- Bathroom cleaners: We tend to use very strong products to clean our bathrooms, specially to get rid of lime scale and dirt in the toilet bowl. These cleaners are made of toxic chemicals that can, apart from damaging your bathroom surfaces, be a danger for your future baby.

What to use: Have a bottle of 50/50 solution of water and vinegar ready to use after your daily shower as a preventative method to avoid lime scale. And use a baking soda paste to clean the surfaces and get rid of mildew.

2- Oven cleaner: There is no mystery on this one. Most of us have felt dizzy while using oven cleaners and ended up with a headache. The chemicals in oven cleaners can cause skin burns, irritation on eyes and lungs and acute poisoning from ingestion.

What to use: Sprinkle baking soda (a lot) all over your oven; then spray water on the baking soda until it starts to make some foam and leave it to work (spray some more water later on if you see that it is getting dry). Wipe the paste and dirt with a sponge.

3- Polish: Chemicals on furniture polish (specially perfum) can cause irritation and allergic reactions.

What to use: A good feather duster or micro fibre cloth and opened windows will do the trick. But if you are looking for a nice odour after doing the dusting, then you can use some scented candles or a home made air freshener like these ones.

4- Window cleaner: A lot of the window cleaners available have ammonia as one of their ingredients. The fumes can cause health problems on lungs and skin.

What to use: Use a spray bottle with a 50/50 solution of water and vinegar and 1/2 teaspoon of washing up liquid. Spray your windows and wipe with a cotton cloth.

Poisoning from house cleaning products is a serious matter and more common than we think. Having some alternatives on hand is always something pregnant mothers should have in mind to protect their health and their new baby’s health.

Too lazy to do house cleaning

I’ve recently red about the new Dettol HABIT study and I have to say it is quite scary. The poll was done on 2000 people in the UK and questions ranged from personal hygiene to house cleaning; and let me tell you, we fail on both!

People are slipping in personal hygiene standards as well as a list of household cleaning jobs. The sad thing is that most of the times this happens because of laziness or people not caring to much.

10% of adults polled said that the last time they cleaned their toilet was two weeks ago. 1/4 of people usually change their bedsheets once every month.

Looking at the kitchen, 1/5 of people haven’t clean or disinfected their fridge in over a year. And 50% do not clean work tops in the kitchen until they are really dirty.

It is true that in a way “not so clean” spaces will make us stronger (our immune system will have the chance to fight back), but a little bit of hygiene doesn’t hurt anybody I guess!

How to clean your painted walls

This weekend I had the chance (and the time) to reorganize my daughter’s bedroom. Not happy to admit, it has been six years that we do not paint our home’s walls, and believe me you can notice all the marks and stains. So, I had time to deep clean the room, but not to paint it and I knew I had to do something about those walls… so I decided to wash them! They look like new now!

The trick is to go wild and be gentle at the same time so you don’t end up with the paint on the cloth. You will need a big sponge, a micro-fibre cloth (or an old towel), a bowl of soapy water, and some washing up liquid.

Here are the steps to follow to clean your painted walls (in case you are a busy bee like me):

1- Decide which area of the wall you would like to clean. You cannot clean the whole wall in one go, so you will need to mentally divide the wall and clean one area at a time.

2- Soak the sponge in the soapy water and then add some more washing up liquid on the sponge. Wash the wall on circular movements. Do not clean only the stains as this will leave marks when the wall gets dry, you have to wash the whole wall with the soaked sponge (You may want to put some newspapers or towels on the floor because this is going to get very wet!).

3- With a damp microfibre cloth, wipe down any excess water and clean any stains left that you were unable to clean with the sponge.

4- Wait for the wall to dry and done! you have a clean wall!

The points to remember here are:

1- Always clean “square” areas of the wall, not only the marks or stains; this way, once the wall is dry the paint will look unified.

2- Don’t let the sponge get dry if you don’t want to strip the paint off the wall.

3- Always clean in circle motions and don’t press to hard.

4- The big sponge is for a reason. If you use a small one you tend to put more pressure on it, ending with the paint on the sponge.

5- This works with non water proof painting also (remember you have to go wild but gentle!).

Happy cleaning!


Do you love house cleaning?

One in three women secretly love cleaning their house.

According to a research conducted by Zoflora disinfectant, 1/3 of women describe their “cleaning relationship” as relaxing and even therapeutic.

But far from telling the world, 50% of them would never dream of telling others about their love affair with house cleaning.

The survey, carried out among 2000 women, found that vacuuming, tidying up and wiping surfaces are three of the house cleaning tasks women most enjoy. The least liked, on the other hand, were cleaning the oven, the toilet or even ironing.

So what do you think? are you a hater or a lover of domestic cleaning?

Domestic cleaning with a twinkle and some magic

This week a woman in the USA has been accused of entering a home, doing some light house cleaning and leaving a bill for $75 for her work. Apparently it is not the first time that this woman, called by some residents “The Cleaning Fairy”, does this and now she is facing burglary charges in the case after being arrested Tuesday night.

Of course this is something to condone but have you ever dreamed of having a sweet Cleaning Fairy going into your jungle-house and find it spotlessly clean at the end of a hard day work?

Would you want one? Which house cleaning task you hate the most that you would love the Cleaning Fairy to do for you? Share with us!

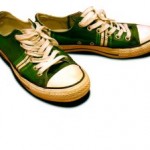
How to clean your canvas shoes

Now that the summer is finally here we start using our canvas on a daily basis. But, like anything else, canvas shoes can get very dirty.


Here is the “how to” of cleaning your canvas shoes:


1- The quick-lazy-don’t have time way:

  • Take the laces and insoles out and place your canvas in the washing machine on a shoe cycle at cold temperature.
  • Leave them to dry and ready to go!

2- The old fashion way (and the most recommended):

  • Take the laces and insoles out.
  • Fill a bucket with cold water and put some mild detergent (Woolite type or neutral soap bar). Put your canvas in.
  • Use an old toothbrush to properly clean every corner.
  • Rinse your shoes in cold water.
  • Don’t forget to wash your laces too! (you can wash the insoles with rubbing alcohol).

Some things to have in mind not to ruin your canvas shoes:

  1. Strong detergents can stain your white canvas.
  2. Never leave your canvas to dry on the sun as they can become yellowy!
  3. If you have white canvas, sprinkle them with talc powder when leaving them to dry. Once dried, brush the talc off with a dry and soft toothbrush. They will look like new!
  4. After washing you canvas, make sure to return them back to their original shape by pulling the material with your hands as canvas shoes tend to shrink a little bit when washed.

Enjoy the weather… and your new canvas!


Weird cleaning tips that work

Here are some cleaning tips to help you around your home:

1- Rub a lemon wedge inside your mug to get rid of tea stains; then wash with soapy water and your cup will be clean as new.

2- White bread will help you clean dirty spots and finger marks on walls and dust on paintings (just make sure that the bread is fresh).

3- Clean your plants with a little bit of mayonnaise or beer to return the shine on them.

4- Strike a match to get rid of all bathroom smells (greener than an air freshener and very effective!).

5- For smelly hands after chopping onion or garlic, just put your hands on running water for 30 seconds without rubbing them and the smell will disappear. Otherwise you can rub your hands on fresh parsley.

6- If you are washing red clothes for the first time, make sure you soak them in white vinegar first; this way you avoid these clothes bleeding all over your other clothes.

7- Put some dry rice onto your salt pot to protect from moisture.

Have you got any funny cleaning tips that work wonders? Let us know!

Domestic cleaning, a little bit of history

Domestic cleaning has been one of the oldest jobs in history; a task usually done by the women in the household.

Just before the “housework revolution” in late 19th Century and early 20th Century, domestic cleaning was a harsh physical task.

The job of bringing water from the pump was exhausting by itself and it needed to be done at least 8 or 10 times a day, so families could have enough water for any household tasks, from cleaning to cooking.

The smoke from coal or wood burning stoves would make walls black and leave carpets full of dirt and debris. So, on a daily basis, all walls and floors and windows had to be washed and scrubbed.

Before the invention of washing machines, doing the laundry was the “monster” task; one that all housewives would hate the most. Clothes needed to be soaked the day before, boiled, starched, rinsed… Homemade lye soap was used, which would irritate women’s hands considerably.

Hard and exhausting domestic cleaning chores started to see light at the end of 19th Century. Do you know that the carpet sweeper was invented in the 1880s? and the mop in 1893? The electric iron was invented in 1903 and the electric vacuum cleaner in 1907. The use of these appliances didn’t extended to all households at the beginning, being only rich families the ones enjoying the improvements. It wasn’t until 1920s and 1930s, when the use of these commodities started to spread, that we could talk about a real revolution in domestic cleaning.

What do you think? Have you find a new love in your washing machine after reading this article?